Adding Appointments to a Treatment Plan

To add an Appointment to a Treatment Plan

  1. When the first service is charted in a patient’s Treatment Plan, an entry automatically appears in the Treatment Planning area along with the Course of Treatment number, the first Appointment and the selected Service to be provided.

    If your computer is not creating the first appointment automatically, 1) Select Configure > Local Parameters, 2) Tick the Auto-Create Course of Treatment checkbox and enter 1 in the Default Number of Appointments field.

  2. Right click on any line in the Treatment Planning Area and choose Add Appointment.

  3. A new appointment will be added directly below the line you initiated the command from.

  4. Each click on the Add Appointment menu item will add another appointment to the Treatment Plan.

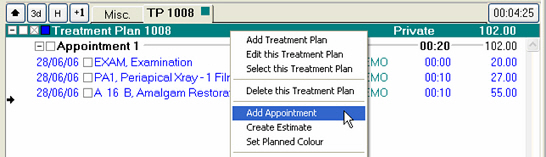
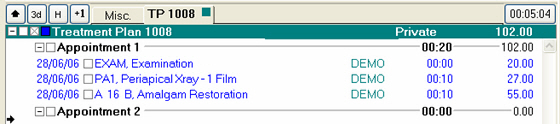
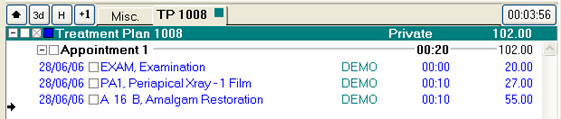
    When adding appointments don’t forget that the first one has already been created.

See also...

Treatment Planning

Buttons and Functions in the Treatment Planning Area

Keyboard shortcuts in the treatment planning list

Auto Charting

Multiple Treatment/Service Items

Modifying ‘Course of Treatment’ Settings

Moving Services into Appointments

Editing Appointment Length

Provider making Notes about an Appointment

Alteration of Completion Dates - Backdating Treatment

Mixing Payors for Treatment

Mixing Payor and Private Courses of Treatment

Moving Treatment between Treatment Plan Tabs

To Hide Treatment Within Appointments

Completing (TC’ing) a Course of Treatment

Resubmitting Treatment for Correction

Adding a Treatment Plan to Batch Invoicing

Estimates

Treatment History

Clinical Notes

Custom Screens Attached to Services

Tooth Charting in 3D Mode

Next >>

Moving Services into Appointments