Default Medical History prompt
By default the Arrival screen shows the Medical History prompt as ticked:
Receptionists can un-tick this field if it proves unnecessary.
Background:
This default setting is controlled per patient from the Medical History Configuration screen.
Patient File > Medical (tab) > ![]() :
:

The Alert if Medical History is [x] months overdue field is by default set to a value of 1.
Consequently, Medical History will be prompted for update once a month, and the arrival window Send a Medical History form to Clinipad tick-box will be ticked by default, unless the patient has already completed their MedHist forms within the last month.
To disable this auto-prompt for a patient, set the value in the above field to 0, and click OK.
To register the patient as "Arrived" without following the Arrival Checklist
To use Clinipad with Patient arrival (summary of procedure)
To use Clinipad with Patient arrival (detailed procedure)
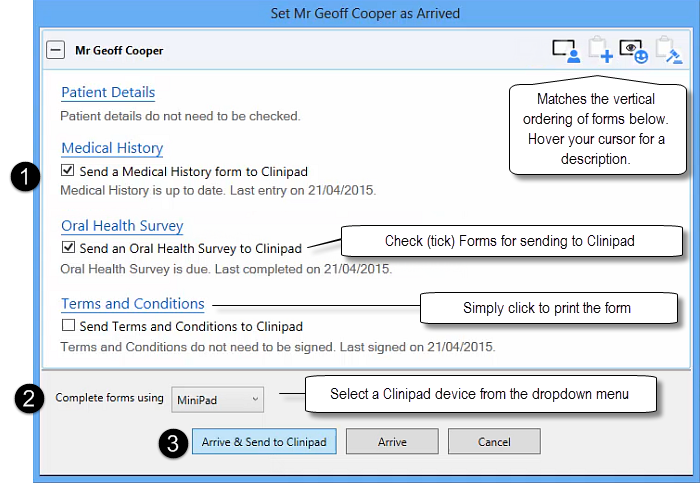
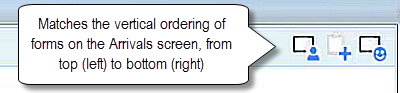
The ordering of icons at top left of the screen matches the vertical ordering of forms on the screen:
Note the two Arrive buttons at the bottom of this screen:
![]()
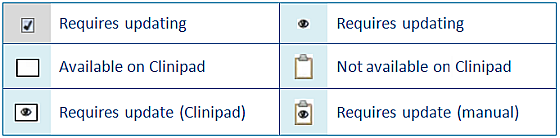
EXACT indicates with a ticked checkbox ![]() when a form needs to be updated by default. Users can optionally override the default requirement and either tick or un-tick the checkboxes.
when a form needs to be updated by default. Users can optionally override the default requirement and either tick or un-tick the checkboxes.
To update Patient Details manually, in the EXACT software
Click the Patient Details hyperlink (![]() ) to open the Patient Details screen, and from where you can complete the fields.
) to open the Patient Details screen, and from where you can complete the fields.
NOTE: Clicking the Medical History hyperlink will cause EXACT to print these forms. which you can then issue to patients to complete manually.
To print out Medical History for the patient to complete
(This makes it quick and easy to update details where you don’t want to use the Clinipad or when one isn’t available)
Click the Medical History hyperlink to open the print dialogue, print the form and issue to the patient.
Form indications:
An icon will appear in the top right corner for each form that the patient can potentially update.
Hover over an icon to see a tooltip description:
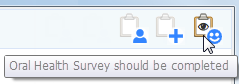
Oral Health Survey examples:
|
|
Due |
Not due |
|
Clinipad form |
|
|
|
Printed form |
|
|
|
Oral Health Survey Checkbox |
Checked
|
Unchecked
|
|
Reasons: |
|
|


The patient selects each form from the list and completes as required, using only a finger or a stylus.
The forms are fixed so any items which don’t appear on them need to be typed into the free text boxes in each section by means of the screen keypad (this appears when you tap into a text box). For example:

Many forms can be signed by the patient directly onto the Clinipad device using their finger or a stylus. For example:
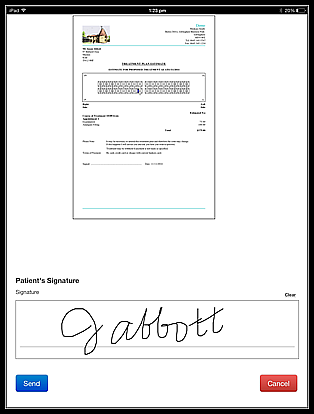
When the patient selects the Send button the signed form displays for patient review. If the patient is satisfied they tap the Done button:
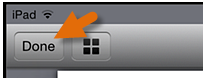
The button on the Clinipad front screen then displays a check (tick):
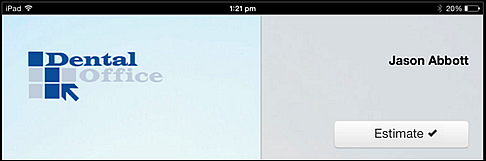
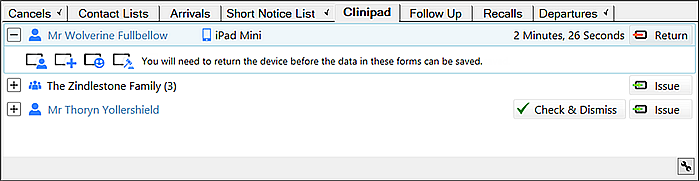
You will be able to see the patient’s name, which Clinipad device they have, which forms they are required to complete and how long they have had the device.
NOTE: The Issue button ![]() is for re-issuing Clinipad to the patient (the initial issue is activated from the Arrival dialogue's Arrive and Send to Clinipad button).
is for re-issuing Clinipad to the patient (the initial issue is activated from the Arrival dialogue's Arrive and Send to Clinipad button).
This makes the device available for the next arriving patient, and displays the status of the patient's efforts on the screen.
You can see which forms were Updated by the patient and those that had No Change.
You can Issue again ![]() if the patient missed them in error.
if the patient missed them in error.
Alternatively if you want to accept that there are no changes then you can click the No Change hyperlink and the patient will be removed from the Clinipad list.
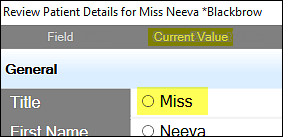
You will see that the form has been Updated. Click this Updated hyperlink to view the changes that have been made in green text:
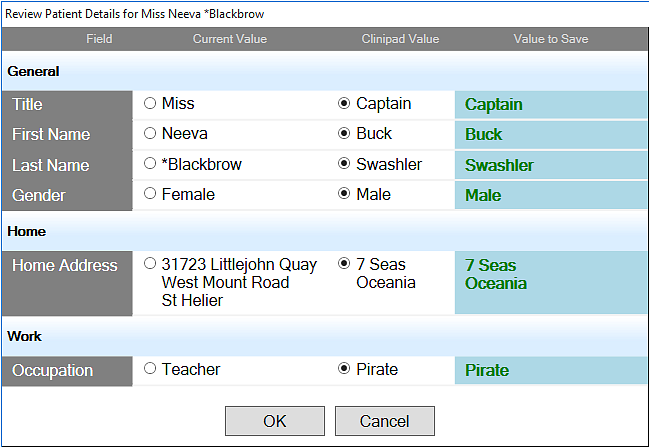
Compare with the current details and either approve the change by selecting OK, or
If you wish to reject any of the changes that the patient made you can select the current value of each item and then select OK:
The patient will then be removed from the Clinipad list, and changes immediately made to EXACT.
In the case of family appointments checked in using Clinipad, the patient simply has to press change patient on the Clinipad device and they will see the list of patient’s available within the family appointment.