Creating an EasyPost Postcard template

What you'll need:

To create an EasyPost Postcard

  1. Select any patient.
  2. Click the Create a Patient Document button EsyPostTemplate-icon2:

    CreatePatientDocumentButton2

  3. Click the +1 button in the Document Details screen to display the Create Template window.

    DocumentDetailsPlus1

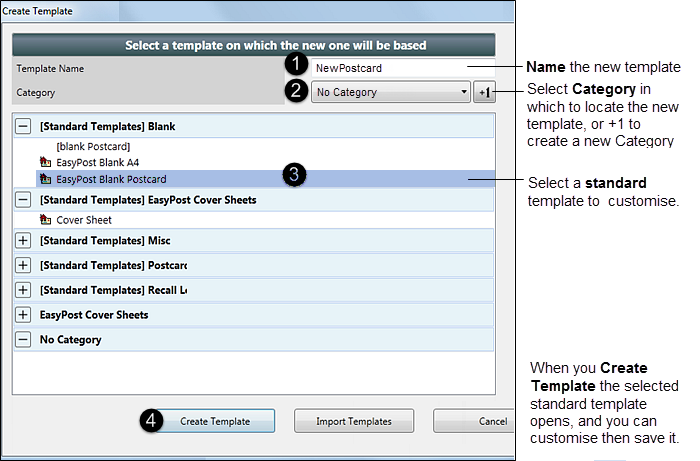
    The Create Template screen displays, with default (locked) Standard Templates listed. You have to base any New template on a standard template, so it is essential to select a starting template.

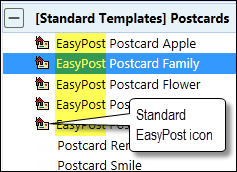
    IMPORTANT: For EasyPost you must select an EasyPost template as these have the address labels set up for EasyPost. All standard EasyPost templates are listed with the EasyPost icon and name prefix:

    EasyPost-OnlyTemplates unalterableLabels

  4. In the Create Template window:

    CreateNewTemplatePostcard

  5. In the EXDOC window, with the blank template displayed for editing,
    1. Click on the blank page at the point where you want to add the image.
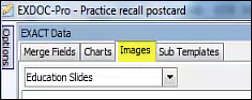
    2. Select the Images tab in the left pane:

      EXDOC-ImagesTab

    3. Click the Binoculars button at bottom right of that tab:

      EXDOC-BinocularsButton

    4. In the Open window, browse for and select the image to add it to the postcard.
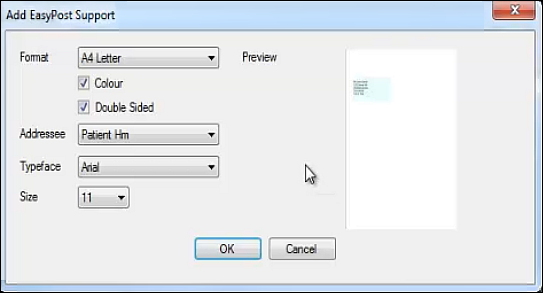
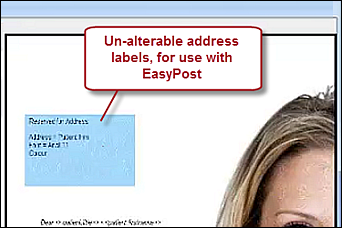
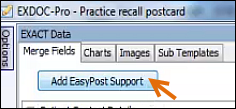
    5. Click on the page where you want the client addresses to be located, then click the Add EasyPost Support button at the top of the Merge Fields tab in the left pane:

      AddEasyPostSupportButton

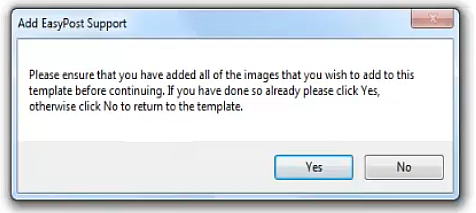
    You will be prompted to confirm that you have added all required images to the template:

    AddEasyPostSupport3

  6. Click Yes to open the Add EasyPost Support screen:

    AddEasyPostSupport4

  7. Select the appropriate parameters for the address, including whether it is a letter or postcard, Colour, Double-sided, placement of the address, which patient address to send to, and the size and typeface of the font.
  8. Click OK and you will see the read-only blue address block appear on the page.
  9. Add any further relevant text to the page and format it as you require:

    AddFurtherTextToTemplate

  10. Select Options in the top of the left pane and click the Save and Close button:
  11. Back in the Document Details screen, click Preview to see how the template appears with actual patient data rather than merge field placeholders:

    PreviewButton

See also...

Using EasyPost

EasyPost Jobs Monitor

EasyPost Jobs Report - viewing, printing, emailing

EasyPost Statements and Invoices

EasyPost automated appointment follow-ups

Sending EasyPost Recall Runs

Launching Presentation Manager to create templates

Document Details window

Previewing a template with fields populated

Creating a letter template

Adding EasyPost support to a non-EasyPost template

Testing the new letter template

EasyPost tasks in Presentation Manager

Next >>

Creating a letter template