Setting up Tabs in the Multi Column Appointment Book

In the User Settings window, click the the Multi ApptBook Tabs setup button.

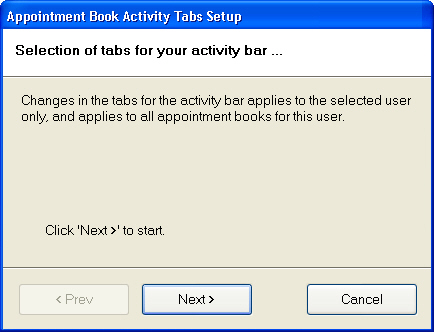
The Multi ApptBook Tabs setup button configures the menu options across the bottom of the appointment book:

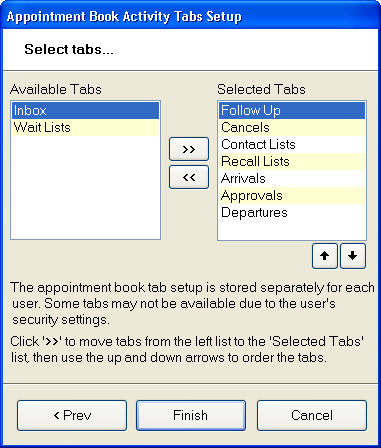
To set up tabs in the Multi Column Appointment Book

  1. Click on the button to open the ‘Appointment Book Activity Bar Tabs Setup’ window as shown below:

  2. Click ‘Next’ to continue. A window similar to the following example will appear:

  3. If any required tabs are not selected in the right hand box, select them from the "Available Tabs" list and click the 'Move right' button button to add them.
  4. If any selected tabs in the right-hand window are not required, select them and click the "MoveLeft" (double arrow) button button to move them to the ‘Available Tabs’ box.
  5. In the ‘Selected Tabs’ window, use the buttons to order the tabs (top in the box corresponds to left in the Appointment Book window, and bottom corresponds to right).
  6. Click ‘Finish’ to complete the process.

    Back in the User File window, don’t forget to click on the button to save the settings then use the button in the top right corner of the window to close it.

See also...

User Names

Adding a new User or Provider

To View and Edit Existing Users

Configuring Users

Setting up Workspace Items

Administrator Privileges

Next >>

Administrator Privileges