Adding slides to an existing Slideshow sequence

To add slides to an existing Slideshow sequence

  1. From the File menu, select Education OR from the Workspace Bar click Education.

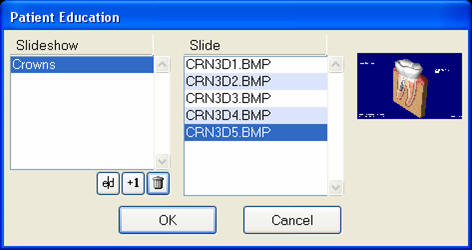
    The Patient Education window displays:

  2. Highlight the Slideshow and click the button to open the Edit Slide Show window:

  3. Click the button to display the list of available slides, select the slides to be added and click the Open button button to add them to the Slideshow.

    TIP:
    To add multiple slides, hold down the CTRL key and click each of the slide files to select them.
    For multiple adjacent files, hold down the Shift SHIFT key, click the first file you want and click the last file you want; the whole block will be selected. You can use both methods together to select both a range AND individual files.

  4. Use the Up and Down arrow buttons buttons to arrange the slides in the correct order (highlight a slide you wish to move, then the appropriate arrow button to move that slide up or down in the list).
  5. Click OK to complete updating the Slideshow, then click OK again in the Patient Education window to preview the slides.

See also...

Patient Education

The Patient Education Slideshow Window

Opening the Patient Education Window

Creating a Slide Show Sequence

Running a Patient Education Slideshow

Removing a Slideshow Sequence

Next >>

Removing a Slideshow Sequence