Quick Reference:
Dentist Recall: |
Hygienist Recall: |
Co-duty Recall: |
|
|
|
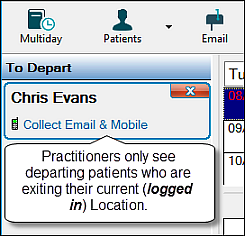
Exit Workflow patients are per Location
From v12.9 onwards, a practitioner who selects a Location when logging in to the practice will only see Departure Task List (exit workflow sidebar) patients for that Location. Patients from other Locations will not display on that practitioner's exit workflow.
To process a patient through the exit workflow when they are booked for the incorrect Location
If a patient is configured for Location A but is incorrectly booked for Location B, that patient will not show in the exit workflow for logged-in Location B practitioners. To process that patient, a practitioner will need to first log out of Location B and log into Location A.
To avoid this inconvenience, focus efforts on correctly recording patient preferred locations, and on correctly booking patients to their preferred locations.
1st Available Gap display
The "1st Available gap" display is resource-intensive, so if your system struggles to cope, this function may be disabled in the configuration. When disabled, you will see only a simple appointment Search rather than the 1st Available Appointment details:

See Improving system performance via Departure List options for options on disabling the 1st Available Gap function.
NOTE: If an appointment listed in the Departure Task List becomes deleted, invalid or completed before the Departure Task List is closed, when you attempt to drag it to the appointment book you will see a message 'The corresponding planned treatment on the patient's chart tab has either been completed or no longer exists. Do you still wish to book this appointment?' Click YES to still book the appointment and link it to the Chart tab. Click NO to not book the appointment and to remove this appointment entry from the Departure Task List.
See also:
Further abbreviated procedures are listed below, and see also:
Marking an appointment as Completed
Adding Departure List appointments to the Short Notice List
Scheduling Appointments from the Departure Task List
Facilitating patient online booking of planned treatment
Scheduling Recalls from the Departure Task List
Processing Payments from the Departure Task List
Recording Patient Details from the Departure Task List
Processing Custom Tasks from the Departure Task List
Improving system performance via Departure List options
To open the patient record
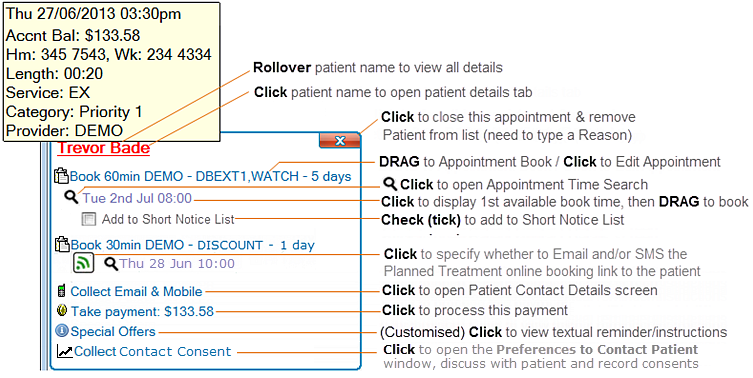
Click the patient time/name to open the patient record, from where you can carry out standard patient administration.
![]()
To mark this appointment as complete
Click the Exit button ![]() .
.
This will trigger a compulsory window for you to type the reason for marking this Appointment Complete.
For consequences and a detailed procedure see Marking an appointment as Completed.
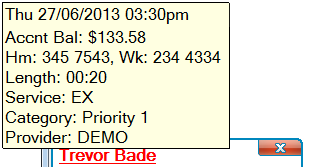
To view patient summary tooltip
Hover your mouse cursor over the patient name:
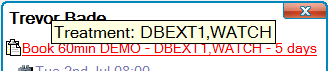
To view a treatment summary tooltip
Hover your mouse cursor over the appointment hyperlink:
To edit an appointment in the Edit Appointment window
Click the Appointment hyperlink to open the Edit Appointment window:

To assign an appointment to the Appointment Book
Locate a suitable time and then drag and drop the appointment:

NOTE: If an appointment listed in the Departure Task List becomes deleted, invalid or completed before the Departure Task List is closed, when you attempt to drag it to the appointment book you will see a message 'The corresponding planned treatment on the patient's chart tab has either been completed or no longer exists. Do you still wish to book this appointment?' Click YES to still book the appointment and link it to the Chart tab. Click NO to not book the appointment and to remove this appointment entry from the Departure Task List.
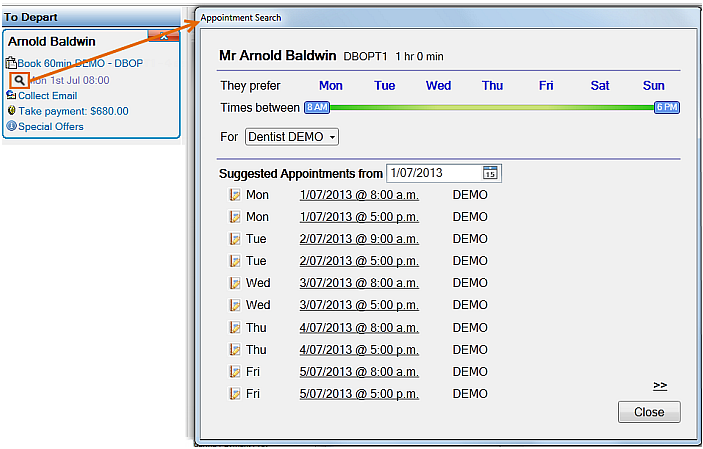
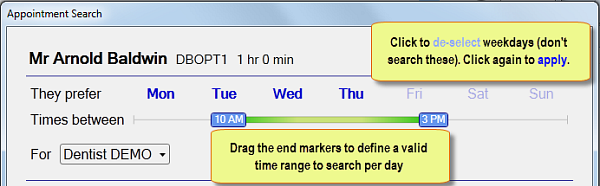
To open an Appointment Search window
Click the Search icon to open the Appointment Search window, pre-populated with first available times, from where you can Book the appointment.
To open the first available appointment slot in the Appointment Book

To send a web address to the patient for self-booking online

To collect Contact Consent from the Departure Task List
Click the link in the Departure Task List to open the Permission to Contact Patient window:
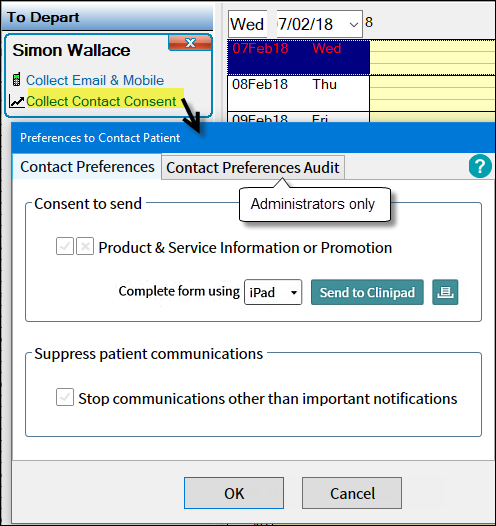
Question the patient and click the buttons accordingly.
Example:
