Configuring New Patient online booking per Provider
Configuration is per Provider
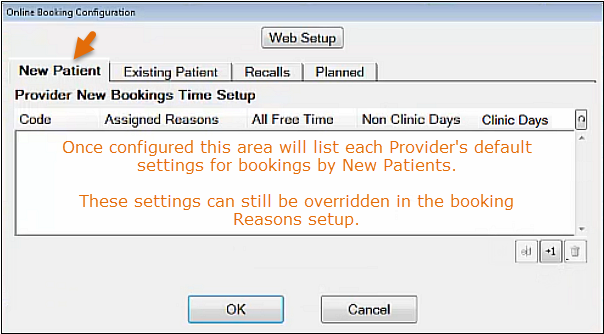
In the Online Booking Configuration screen a New Patient tab enables the default configuration per Provider.
Plan these parameters for each Provider:
Appointment time per patient type (online appointment duration and the default New patient service).
Free Time available for new online patients (no appointments booked for that period, allowing for new patient booking into the free time)
SMS and Email Confirmation Templates (confirmation of patient booking)
Consider setting up clinics as a means of reserving appointment slots.
To configure the DEFAULT New Patient online booking settings for each Provider
Select Configuration > Online Booking to open the Online Booking Configuration screen.
Select the New Patient tab:
The task now is to set up each Provider with their own default settings that apply when New Patients book with that Provider.
Overview: You need to click the +1 button to open a configuration screen, edit the fields on the screen and save, then repeat by means of the +1 button for all Providers who will be available for online bookings.
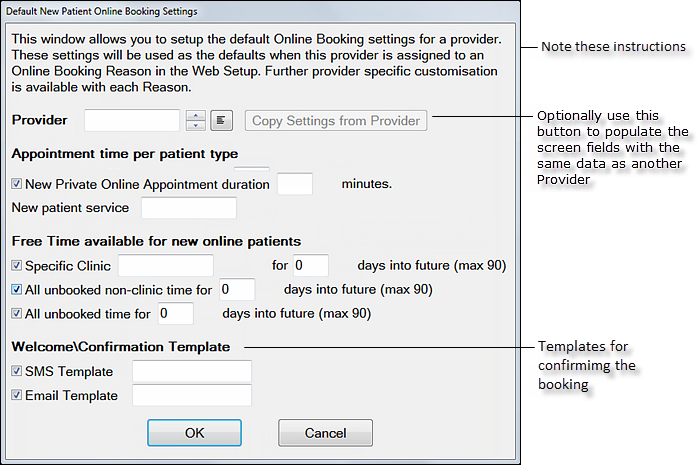
Select the [+1] button to open a window in which to configure a Provider for the New Patient online booking:
Provider: Select a Provider or type a Provider code.
Note that you can optionally populate these fields by selecting the Copy settings from Provider button and then selecting the other Provider from the popup window:
Configure the Appointment time per patient type:
Either set a default appointment duration in minutes or type in the New patient service code (each service is configured with a service duration that EXACT will note as the appointment duration)
Configure the Free time available for new online patients.
Specific clinic:
Check (tick) this checkbox if you are limiting online bookings to one specific clinic.
Select the clinic:
Specify the days into the future.
All unbooked non-clinic time: Check (tick) this checkbox if you are limiting online bookings to all time available outside of clinics. Set the days into the future.
All unbooked time: Check (tick) this checkbox if you are limiting online bookings to all free time, whether in or out of clinics. Set the days into the future.
Setup Welcome\Confirmation Templates (where the new patient is welcomed and receives confirmation of the booking) in SMS and Email. Either use the same templates as for other booking types or create templates especially for new patient online booking.
Select OK to save.
You may see a NOTE:
This clarifies that the custom settings in the Web Setup > Reasons will not be overridden by the default setup.
Repeat this procedure for all appropriate Providers.
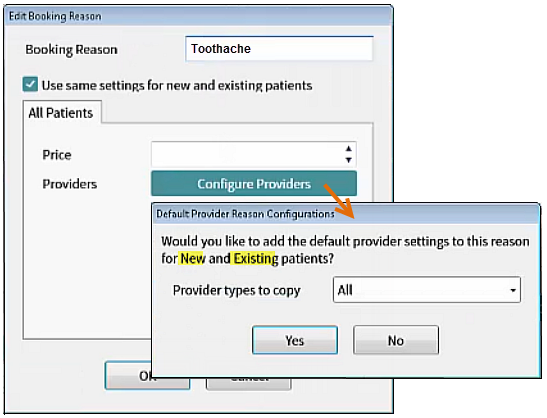
The above default settings can be used to speed creation of Booking Reasons
In the above Online Booking Configuration you create default settings for each Provider for New-patient online bookings.
When you later come to configure Booking Reasons in the Web setup, you will then be able to optionally pull these defaults into each Booking Reason. For example, a Toothache Booking Reason:
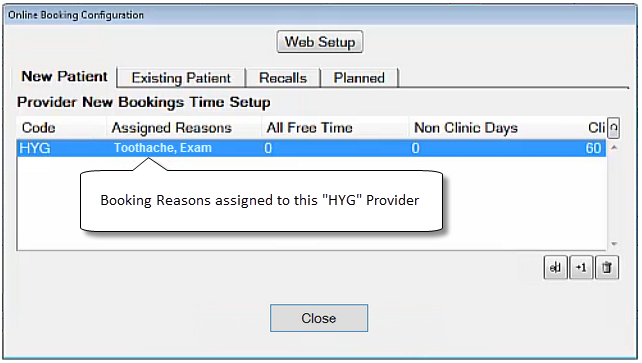
Once created, Booking Reasons will display in the configuration screen per Provider