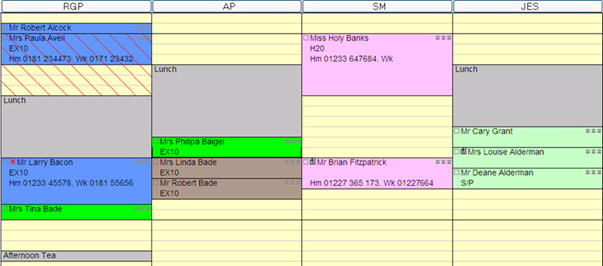
The ‘View Day’ area displayed below shows an example of colour-coding for each provider's day as follows:
NOTE: Colouring of appointment block is set up in the Configure menu, under "Appointment Book". See To Create an Appointment Book (To Create an Appointment Book, Creating an Appointment Book for a Provider) for more details.
The scroll buttons on the top right hand side of the appointment book are used to move the ‘View Week’ area to display other days as described below:
|
Always returns the display to the current day (i.e., today). |
|
Moves back / forward in time 1 day from the current day displayed |
|
Moves back/forward in time 1 week |
|
Moves back in time 4 weeks |
|
Moves back in time 27 weeks (27 weeks rather than 26, to avoid problems with users accidentally booking two appointments within a 6 month period (Note insurance rules)). |
Weeks behaviour: This behaviour ensures that the current weekday (as selected in the week view area) is also selected when you move forward/backward,
So, for example, if you're currently looking at a Friday, pressing these buttons will move to a Friday. The behaviour of the similarly named buttons on the view months window is the same.
Click the drop-down arrow ![]() on the top left hand side of the appointment boo to display a calendar. Select a date by clicking once on the required day. The appointment book will move directly to (and display) that day
on the top left hand side of the appointment boo to display a calendar. Select a date by clicking once on the required day. The appointment book will move directly to (and display) that day

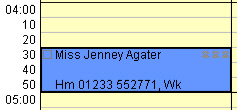
The top of the appointment represents the start time of the appointment while the height represents the appointment length. For example, the following appointment starts at 4.30pm and lasts for 30 minutes.