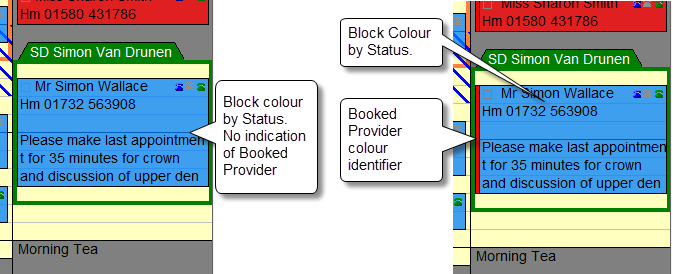
Many practices historically coloured appointment blocks by Provider. When coloured by Status (stage of care) there is an option for a vertical colour indicator that identifies the Provider for the appointment:
Configuring this indicator requires
Enabling the indicator by checking (ticking) a checkbox, and
Setting an appointment colour per Provider in the Provider File
To enable Booked Provider colour display
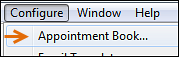
Go to Configure > Appointment Book:
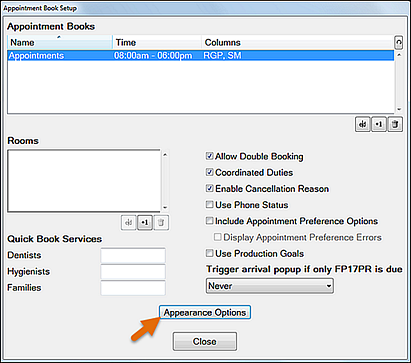
In the Appointment Book Setup screen, select the Appearance Options button :
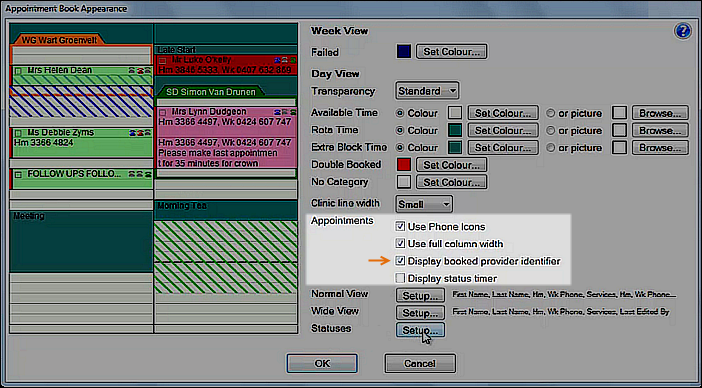
In the Appointment Book Appearance screen, under the Appointments section, check (tick) the checkbox for Display booked provider identifier:
Select OK and Close out of the configuration screens.
(You will need to restart EXACT to enable the settings, whether at this point or after further configuration).
To set the colour per Provider for the booked provider colour display
Go to File > Providers...
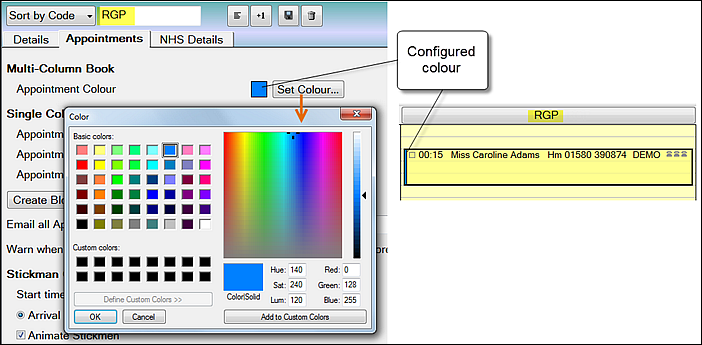
In the Provider File, select a Provider (in the example below, "RGP") and select the Appointments tab.
Select an Appointment Colour and then select the Save button :
Repeat for all required Providers.
(You will need to restart EXACT to enable the settings, whether at this point or after further configuration).