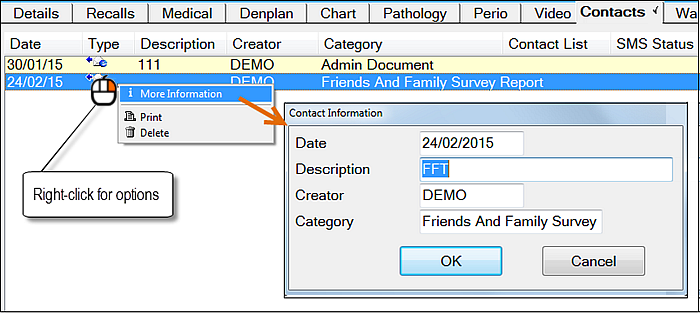
TIP: Right-click a Contact record to see options. For example:
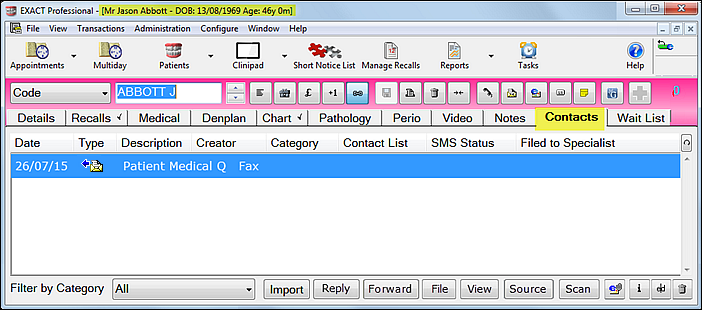
Contacts tab fields:
Date Column |
This displays the date the document was assigned when scanned into the patient file. This is generally the date the document was scanned or imported but can be changed at the time of scanning/importing to reflect the document creation date. |
||||||||||||||||||||||||||||||||||||
Type |
The type of contact is indicated by the symbol displayed to the right of the date.
A status tooltip displays when you hover your mouse cursor over SMS contacts. |
||||||||||||||||||||||||||||||||||||
Description |
Displays the description of the document. |
||||||||||||||||||||||||||||||||||||
Creator |
The name of the person who created the document. |
||||||||||||||||||||||||||||||||||||
Category |
There are seven preset document Categories: Admin Document, Clinical Document, Clinical Diagram, Medical History, Treatment Card, Transfer Document and Other Document. These are used to classify all documents scanned or imported into the Contacts tab, and also letters that are created within EXACT. |
||||||||||||||||||||||||||||||||||||
Contact List |
If the Contact entry was generated from a Contact List, the Contact List name will be displayed here. |
||||||||||||||||||||||||||||||||||||
SMS Status |
This column will display a brief explanation of the status of any SMS message that has been initiated to send to a patient, corresponding to whichever of the six SMS status icons is in the Type column. |
||||||||||||||||||||||||||||||||||||
Filed to Specialist |
If a copy of a document was also sent or emailed to a specialist, their name will be recorded here (conversely, any communication with a specialist and also copied to the patient will be recorded in the Specialist's "Contacts" tab.) |
Contacts tab controls:
Import |
Import an existing document (EXDOC only) |
Reply |
Reply to a Contact (EXDOCe) |
Forward |
Forward a Contact (EXDOCe) |
File |
File the current document against a patient and/or specialist. This will open the following dialog:
Select the appropriate patient and/or specialist, and click the OK button. |
View |
The View button is used to view email messages, and is greyed out for other documents. To view other documents, double-click the item. |
Source |
Select Scanner (EXDOC only) |
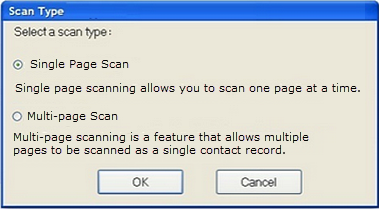
Scan |
Scan Document (EXDOC only). Select this to open the Scan Type window:
|
Attach
|
Highlight a document on the contacts tab, then click this button to send the document as an email attachment to the patient (they must have an email address set up in their patient file). The button is greyed out and inactive until a document is highlighted. |
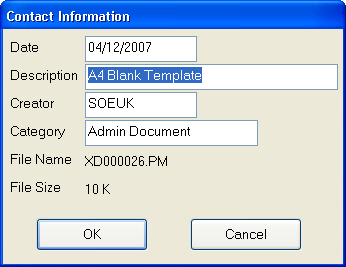
Information
|
Opens a window for displaying and editing the contact information for the highlighted item:
|
Edit
|
Edits the selected Contact. Alternatively double-click on a Contact entry (editing of letters is available only if EXDOC is installed). |
Delete
|
Deletes the highlighted item. |