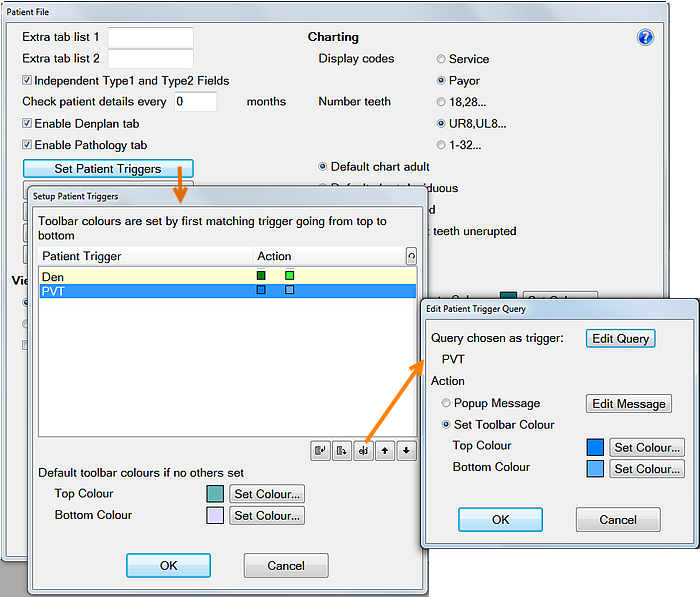
Patient Triggers enable you to either pop up custom notes or change the colours of the top and bottom toolbars when the selected Query activates.
To access Setup Patient Triggers
On the Configure > Patient File screen, click the Setup Patient Triggers button (formerly called the Set Toolbar Colours button).
To Add a Trigger:
From the Setup Patient Triggers window, click the Insert into List button:
Select a query from the View Query Templates window and populate it if required, as shown below:
If the query you require is not present in the list, you can add one - see Creating a new Query.
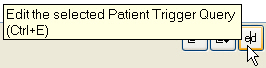
If you have added a new query to the list, the Edit Patient Trigger Query window will open. Otherwise, with the required query highlighted, click on the Edit Patient Trigger item button:
This will open the following window:
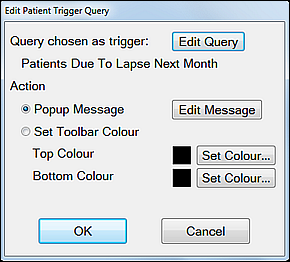
Choose whether the trigger activates a popup message or sets the toolbar colour.
For toolbar colour, use the button if the displayed colour is not the one you require.
If you choose the Pop-up Message action, you will be warned if:
You try to close the window without first setting up the message, or
The message you have set up is blank.
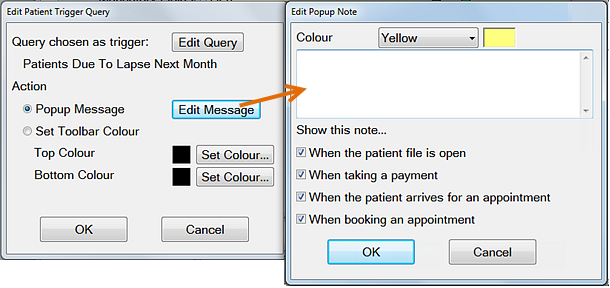
Clicking on the Edit Message button will display the Edit Popup Note window:
Add or edit the message text as required, and click on the Show this note... option(s) that you want. These are not mutually exclusive (you can choose as many or few as you wish), and function the same way as regular pop-up notes.