Changing a patient's Payor

When to change a patient's Payor

Use this User Search and Change function when your practice no longer supports a particular payor scheme and you wish to transfer all the scheme’s patients to a new payor.

Before you proceed...

Because of the changes this utility may make to the database, before you proceed it is imperative that you ensure that:
- All other users are logged out of EXACT
- You make a full back up of the system.
If you are at all uncertain about using this utility please contact SOEI Support.

To run the 'Search and Change' utility to change a patient's payor:

  1. Ensure that all other users are logged out of EXACT.
  2. Make a full backup of the system.
  3. Select Administration > Search and Change...

    'Search and Change' menu option

  4. The first screen is informational; read the instructions carefully, then click the Next > button.
  5. From the Type of Search and Change screen, select the option to Change patients to a new payor, then click the Next > button.

    SearchAndChange1

  6. In the Change a Patient's Payor screen,

    SearchAndChange-ChangePayor1

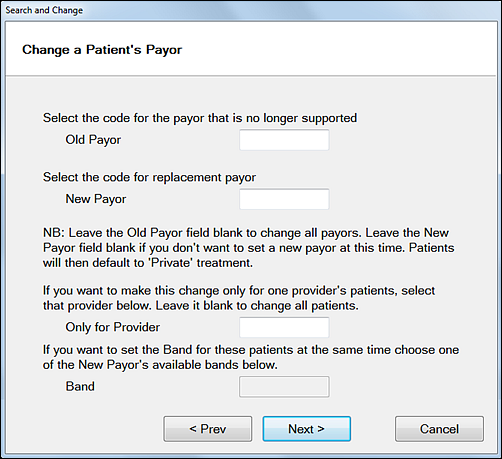
    1. Enter the code for the Old Payor, or select by means of the selector buttons .

    Leave this field blank if you wish to change patients for ALL payors to a new payor scheme.

    1. Enter the code for the New Payor, or by means of the selector buttons .

    Leave this field blank if you want to select a payor at a later time.

    Because in this instance the patients will default to private treatment, you can also use this field to change all patients from one or all payors to private treatment.

    1. If necessary use the Only for Provider field to select only those patients of a particular provider.

    If you also specify an Old Payor, only those patients who belong to the specified payor AND this provider will have their payor changed.

    If you leave the Only for Provider field blank, it will be ignored in the search process.

    1. If the New Payor scheme is a capitation scheme, you can set the Band for the selected patients so it is applied at the time of the change, otherwise this field is greyed out.
  7. The Next > button will be ‘greyed out’ until all fields have been filled out correctly.
    When you click it, you will be given some final instructions before you opt to abort the process, make changes, or finish the search and change.

    SearchAndChange-ChangePayorFIN

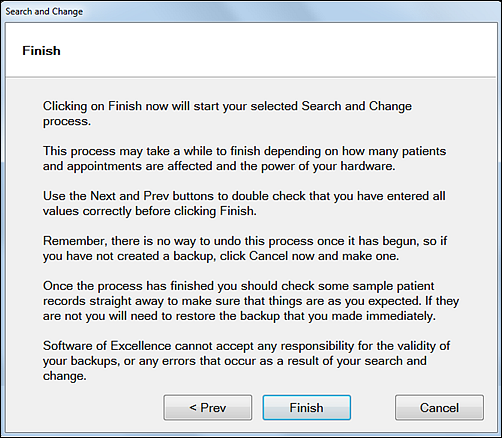
    Read the instructions on the screen carefully. Note that if the change involves many patients, and your system is busy, the Search and Change process may take quite some time to complete.
    Up until you click the Finish button you can still abort the process and use the < Prev button to make changes to your selection criteria.

See also...

Search and Change Wizard

Transferring Appointments when Provider has left the practice

To Make Patients Inactive

Transferring a group of Appointments between Providers

Next >>

To Make Patients Inactive