(See also Contacting SINGLE Patients by SMS)
![]()
To contact by SMS
The Contact by SMS window launches:
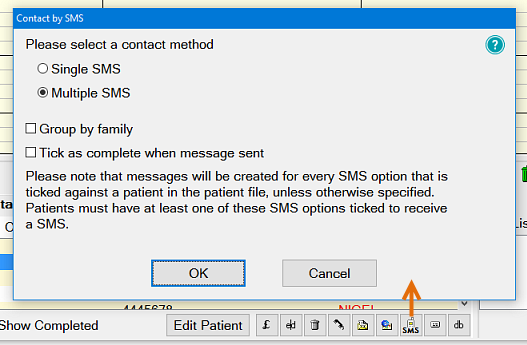
Select the either Single SMS or Multiple SMS.
The ![]() Group by Family checkbox will apply to SMS as it does for letters, and allows email to family members to be sent together. It is greyed out and unavailable if the Single SMS option has been clicked.
Group by Family checkbox will apply to SMS as it does for letters, and allows email to family members to be sent together. It is greyed out and unavailable if the Single SMS option has been clicked.
The ![]() Tick as complete when message sent checkbox will flag the recall procedure for the SMS recipient(s) as completed once the SMS is sent.
Tick as complete when message sent checkbox will flag the recall procedure for the SMS recipient(s) as completed once the SMS is sent.
With this unchecked the patient is not marked as Complete on the contact list until further manual action is taken. In other words, leave the checkbox unchecked if you want a reminder to take further action.
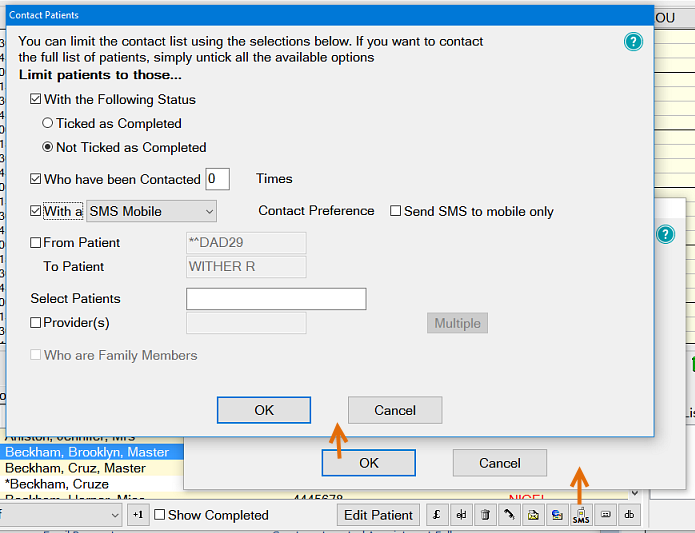
See the Contact Multiple Patients window for details.

At this point, you can either:
To edit the Stagger SMS sending option:
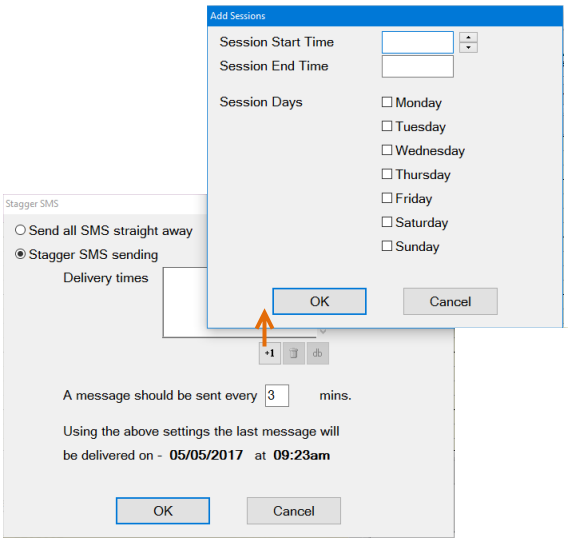
Once you have reviewed (and edited the staggered settings, if required), click the OK button.
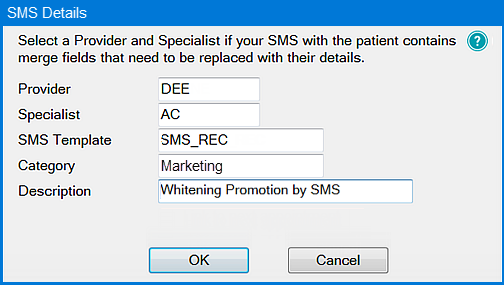
If you wish to also send an SMS to a specialist, select their code in the Specialist field, then tick ![]() Email the Selected Specialist checkbox.
Email the Selected Specialist checkbox.
You can also choose an SMS template if you wish to use a preset message as a basis for the SMS.
If you do so, the Description field is automatically filled, but may be edited if required.
Similarly, the Category field is usually defaulted but can be changed or deleted if you wish.
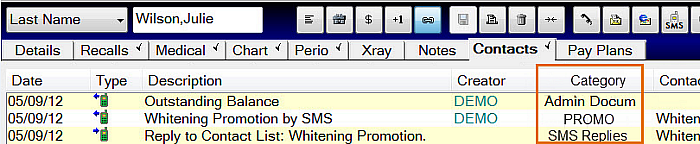
The Category becomes important in the Patient Contacts Tab, where we can sort by Category column to see what kind of contacts have been made with the patient:
If you have selected an SMS template, the text from the template will be displayed, but you may still edit the details of this if you wish, by clicking in the field.

Note the following:
The contact list entries will be updated with the appropriate SMS status icon in the Type column.
For an SMS message, one of the following icons may appear, depending on the status:
|
|
SMS appointment reminder sent to recipient (delivered) |
|
|
SMS message received by gateway (sent, but not yet delivered) |
|
|
SMS delivery failed (where SOE is the SMS provider; password is wrong, insufficient credit, etc.) |
|
|
Reply received (for SMS reminder sent to patient) |
|
|
SMS status is now available |
|
|
SMS status unknown (TXTConnecxions / Icetrak / 4Production) |
|
|
SMS failed or not sent to gateway |
|
|
SMS status unavailable (other SMS providers) |
A tooltip displays when you hover your mouse cursor over each of the icons.
In each case they will have the appropriate icon in the Status column.
Only email replies will appear in the Email Inbox.
If staggered recall settings are in effect, the column marked with a clock icon ![]() will have a corresponding icon for any items in the Outbox that are subject to the settings.
will have a corresponding icon for any items in the Outbox that are subject to the settings.
If you hover your mouse cursor over the icon, a tooltip will tell you when the SMS is due to be sent, as in this example:
