Selecting or creating an Email Template

NOTE: The interface and procedure for creating Email templates differs to that for creating SMS templates.

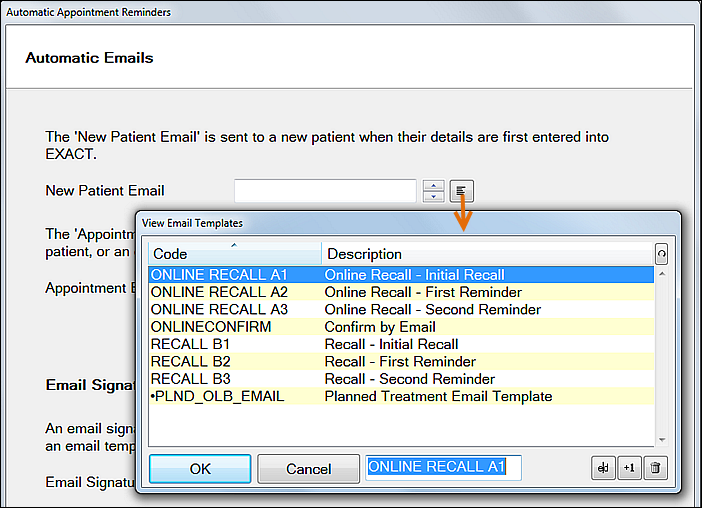
To select an existing Email template (example)

  1. Click in a field to see the selector controls for that field.
  2. Either click the Up/Down arrows to scroll through options, or click the List icon to view the Email Templates list:

    AutomaticAppointmentRemindersWizard-2A

  3. Select a template and click OK.

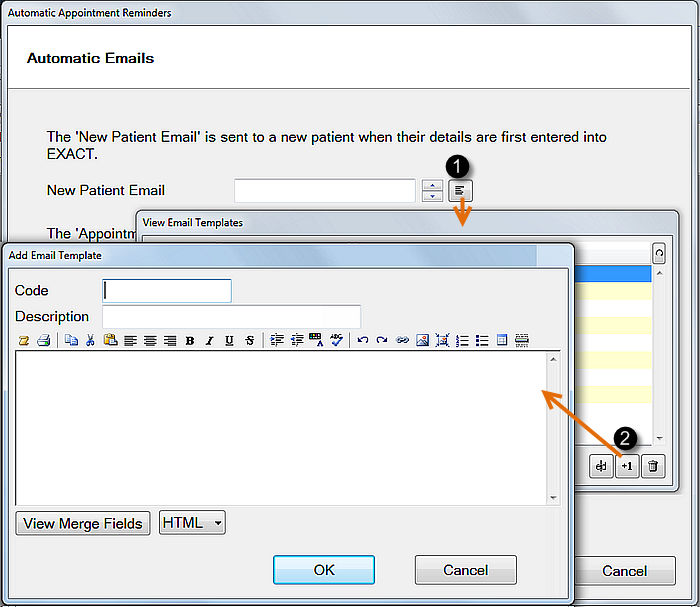
To create a NEW Email template (example)

  1. Click in a field to see the selector controls for that field.
  2. Either click the Up/Down arrows to scroll through options, or click the List icon to view the Email Templates list:
  3. Select the Plus 1 button to open the Add Email template window:

    AutomaticAppointmentRemindersWizard-2B

  4. Type a Code and a Description. These will display in the list of templates (as demonstrated above, in Selecting an Email template).
  5. Create the body of the email using the available controls. However, wherever you need a Form Field, insert from the Letter Merge Fields list:

    AutomaticAppointmentRemindersWizard-2C

    Appointment Email example:


    Without Merge Fields:
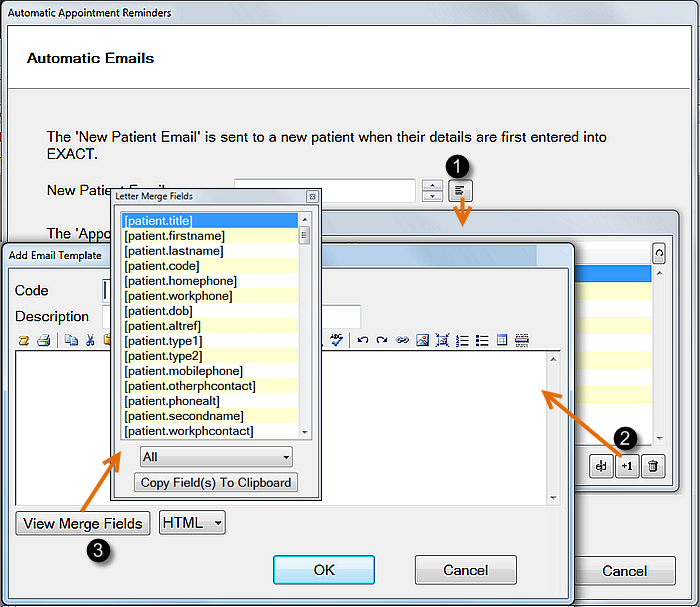
     

    With Merge Fields:


    Mr. Jones, you have an appt at 08:00 on 12 July 2012.

    Please confirm by replying just YES or NO.

    Thank you, Helen Radcliffe, Dreamy Teeth.


    [patient.title][patient.lastname], you have an appt at [patient.nextappttime] on [patient.nextappdate].

    Please confirm by replying just YES or NO.

    Thank you, [provider.name], [practice.name].

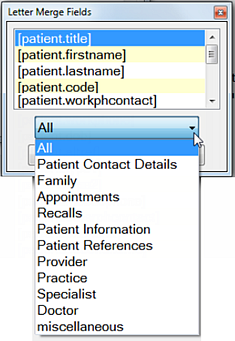
    You can also use category selection to display specific Merge Fields:

    AutomaticAppointmentRemindersWizard-2D

See also...

Configuring Automatic Emails

Next >>

Configuring Automatic Reminders and Replies