Double-click the Clipboard. This will display the ‘Edit Appointment’ window. When finished, the patient and appointment details will be on the clipboard to drag to an available appointment slot.
- Or -
Double-click an empty appointment slot for a provider; this too will display the 'Edit Appointment' window, but when you have finished, the provider and appointment are already allocated.
In both cases, the next steps are as follows:
Click on the button on the Tool Bar as pictured below:
This will display the 'Add Patient' window:
Enter the required details (those in yellow on your screen) and click the button to create the new patient record.
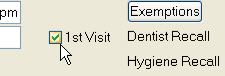
This will load the patient into the ‘Edit Appointment’ window with the details you have entered. You will notice the patient has a tick in the ‘1st Visit’ check box to identify this patient as a ‘New’ patient.
Enter the appointment details as normal and save.
(If you started the data entry by double-clicking the clipboard, you can then find a suitable time found for the patient’s appointment by dragging from the clipboard to a convenient appointment time).
When you book the patient into the appointment book you will notice a red star beside the patient’s name. This is the New patient symbol so that when the patient arrives you are reminded they are new and therefore need to complete a Medical History form, and you can enter any other details required.