 button on the Tool Bar to open it, or select File > Patients...
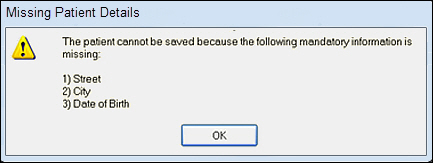
NOTE: Some fields may have been designated as mandatory. These fields have a highlighted background (yellow, in the following examples) and must have information entered in them in order to save the contents of the window with the OK button. If not filled in, a message will appear stating which fields:
TIPS:
- Use the Tab button on the Keyboard to move between fields in this window. This will activate each field ready for your entry.
- It is not necessary to use uppercase (capitals) since the program will capitalise letters where needed. However, you can force upper/lower case where required (e.g., in “van den Heuvel”) by overtyping the defaulted values.
|
In First Name enter the patients first or given name. |
|
In Family Name enter the patients last or family name. |
|
In Title enter an appropriate title of Mr, Master, Mrs, Miss, Ms, Dr, etc. |
|
TIP: Entering a title will automatically add the appropriate gender to the Sex field for most titles. If a Title was entered the Sex field will already contain Male or Female. If not, type M for male or F for female in the Sex field and the program will complete the entry when you move to the next field. |
|
This field allows entry of the home address (the default), the work address, or both. Click the appropriate button to change between the two. Note that for work address, there are no mandatory address fields. |
|
Enter the patients mailing address in the Street field. |
|
If required, use the |
|
Use the |
|
If required, enter the state of residence. |
|
If required, select the post code using the |
|
In Home Phone enter the patients residential phone number, e.g. 612 777777. |
|
In Mobile enter the patients cell phone number if required. |
|
In Work Phone enter the patients phone number during work hours, e.g. 965 777777. If required, add a contact name (or extension number) in the field to the right. |
|
In Alternate Phone enter the patients alternative phone number. |
|
Enter Fax and/or Pager numbers for the patient as required. |
|
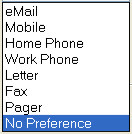
Click on the down arrow next to No Preference and select the patients preferred means of being contacted for recalls, etc., from the following list. |
|
Click in the Types fields and use the use the |
|
If required, enter any previous surname that the patient may have had; for example a maiden name. |
|
If required, enter any other name the patient is known by; for example a nickname. This allows letters to be more personally addressed. |
|
The Misc. field can be used for miscellaneous items related to the patient that the practice wishes to record. If required, select the appropriate code from the list. |
|
If required, click in the Occupation field and use the |
|
Use the |
|
Use the |
|
Use the |
|
In the Referred By field, enter the means by which the patient heard about the practice. If it was from another patient, select the name using the |
|
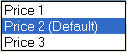
Enter a Price Code for the patient. Click on the |
|
If the patient has a preferred method of anaesthesia, enter it in Ana. Pref field. This will display on the screen during treatment. |
|
The normal payor for the patient is entered here. This is selected from a list of payors by using the |
|
Enter the normal Paying Patient here. Select from a list of patients by clicking on the selector buttons |
|
This field records the relationship between the patient and their family members. |
|
Click the checkbox if the patient record is to be flagged as “Inactive”. Use the |
|
The patient is uniquely identified by this system-assigned code, which cannot be edited. |
|
The Alt. Reference field is an optional field that can be used to categorise and sort patients. It is used in the Sort By field in the left-hand end of the toolbar in the Patient Details screen, and may also be used in reports. |

 Family Members: