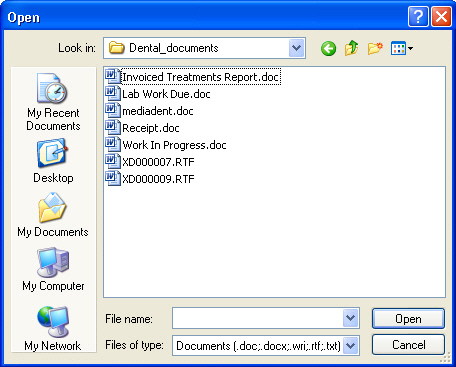
Click the button. A window similar to the following will appear:
NOTE: If your document is not any of the default ‘Files of type’, click on the button to locate the appropriate type option.
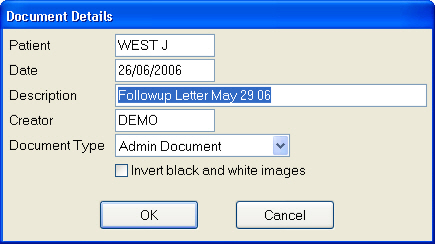
Locate the document you want to import and double-click it, or highlight it, then click the button. The following screen will open to enable you to identify the imported document using the available fields.
In the Patient Details window, select the patient the document relates to. (The patient will default to the patient record you are using).
If you are undertaking a bulk importing session, click the ‘Import’ button from any patient record and select the correct patient in the Document Details window. This will save each imported document into the correct patient record.
Change the Date from the current date to either the date the document was created or the date the document was received. (Set a policy for your practice as to which date will be recorded.)
Enter a meaningful ‘Description’ that will allow you to easily distinguish this document from others the patient may already have on file.
The ‘Creator’ should be changed to the name of the person who authored the document. (Choose a standard for entering names such as Lastname Initial, e.g., Smith A.)
Choose the ‘Document Type’ that best represents the document you have imported.
Click on the ‘OK’ button.
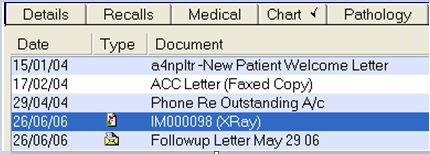
The Document will now be displayed in the ‘Contacts’ tab, which will look similar to the following:
Note the icon next to the item on the bottom line, indicating that the imported item was a letter.
Since EXDOC has copied the original document and placed the copy within the EXACT Dental System, you may wish to delete the original document from your computer.