Refer to your selected scanning software instructions to scan the document.
The following screen will appear after scanning the document is complete. This window enables the user to identify the scanned document using the available fields.
In the Patient Details window, select the patient the document relates to, using usual means (the patient will default to the patient record you are using).
If you are scanning multiple documents, click the ‘Scan’ button from any patient record and select the correct patient in the Document Details window. This will save each scanned document into the correct patient record.
Change the Date from the current date to either the date the document was created or the date the document was received. (Set a policy for your practice as to which date will be recorded.)
Enter a meaningful ‘Description’ that will allow you to easily distinguish this document from others the patient may already have on file. If you are scanning part of a multi-page document your description should include the Page Number.
The ‘Creator’ should be changed to the name of the person who authored the document. (Choose a standard for entering names such as Lastname Initial, e.g., SmithJ.)
Choose the ‘Document Type’ that best represents the document you have scanned.
NOTE: Certain types of scanner software give a reverse image (white text on black background). If this occurs to your scanned documents you should tick the ‘Invert Mono Images’ every time you scan to correct the problem.
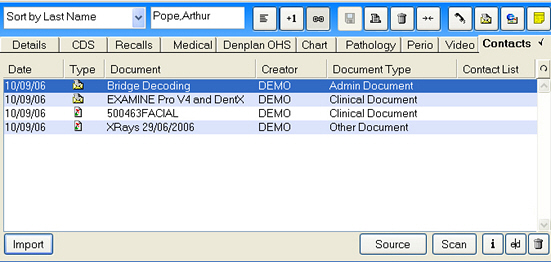
Click on the button to save the document, which may take up to a couple of minutes depending on the size of the document and the speed of the PC. On completion the document will be displayed on the ‘Contacts’ tab in the Patient File as shown in the following example:
Note the Contact Entries that show the symbol. This identifies it as a Scanned Document (Image).