Creating an ExtraOral Pathology Chart

To create an ExtraOral Pathology Chart

  1. With a patient selected, click the +1 button at the bottom of the Pathology tab to create a new exam.
  2. Select Extra Oral Exam and click the OK button:

    CreateExtraOralPathologyChart1

  3. If Extra Oral was clicked in the the Create a New Pathology Exam window, the Add Pathology Chart will look similar to this example:

    AddExtraOralPathologyChart1

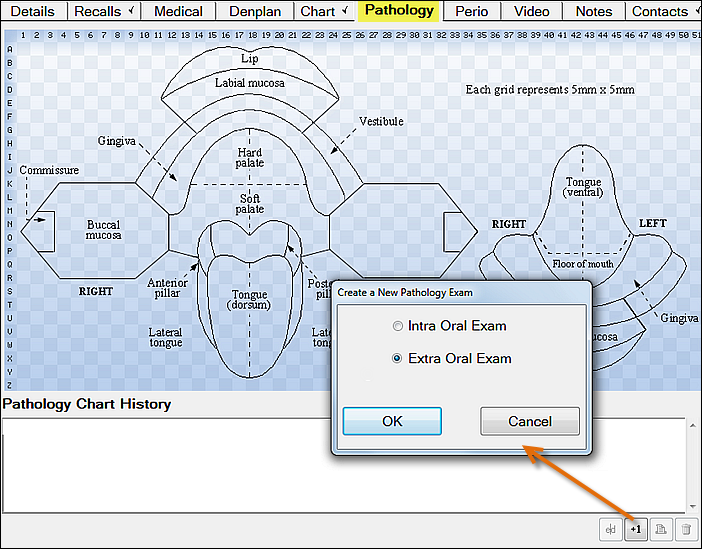
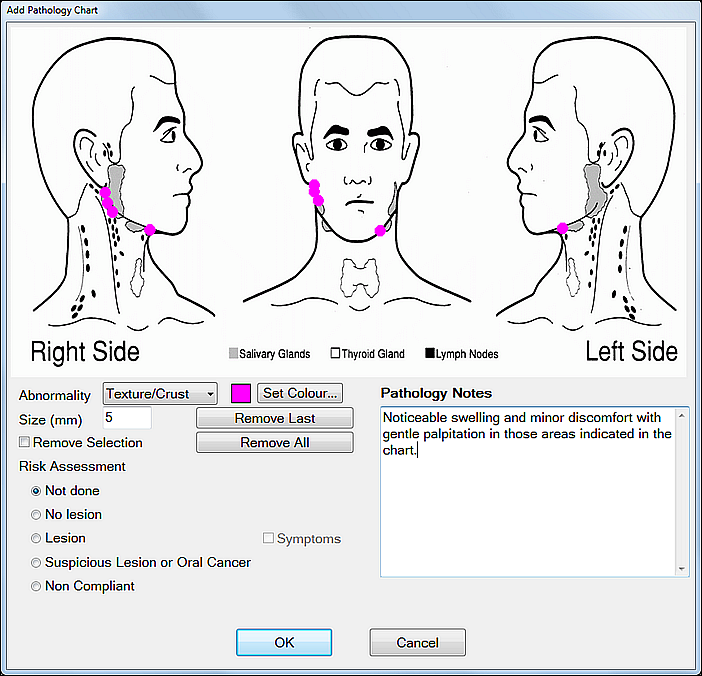
    This opens the Add Pathology Chart window.

    Until you click the OK button none of the changes made in this session, whether adding or removing details, will be retained.

  4. To chart Abnormalities in different colours:

    ChartingAbnormality
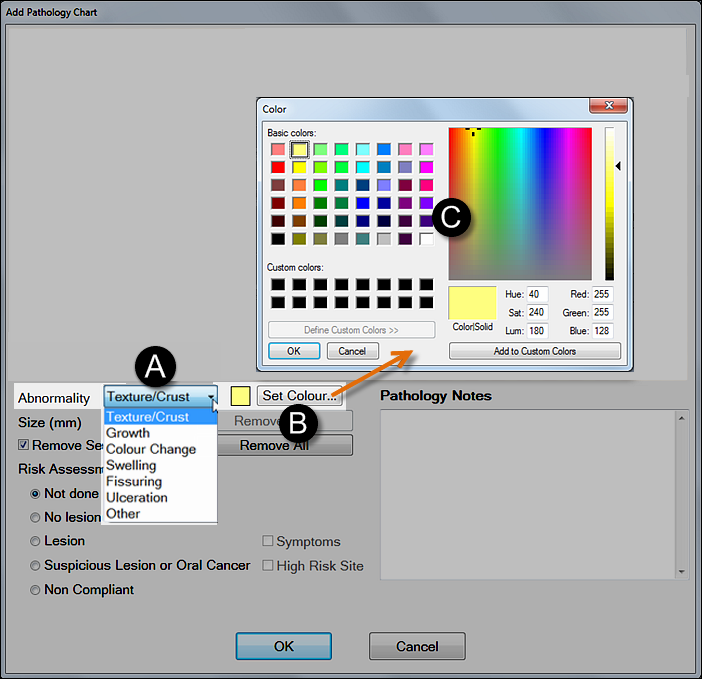
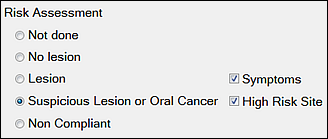
    1. Select a preset Abnormality category from the dropdown.
    2. Click the Set Colour button.
    3. Select a colour from the colour picker and click OK.
    4. To paint standard dots of colour, set the dot size in mm between 1 and 25, and ensure that the Remove Selection checkbox is checked (ticked), then click to paint dots on the chart:

      Paint5mmDots

    5. To paint variable-sized dots and ovals of colour, un-check (un-tick) the Remove Selection checkbox, then either click for a dot at the set size or drag to form an oval shape:

      Paint5mmDotsOval

    6. Repeat this process for all required abnormality categories.
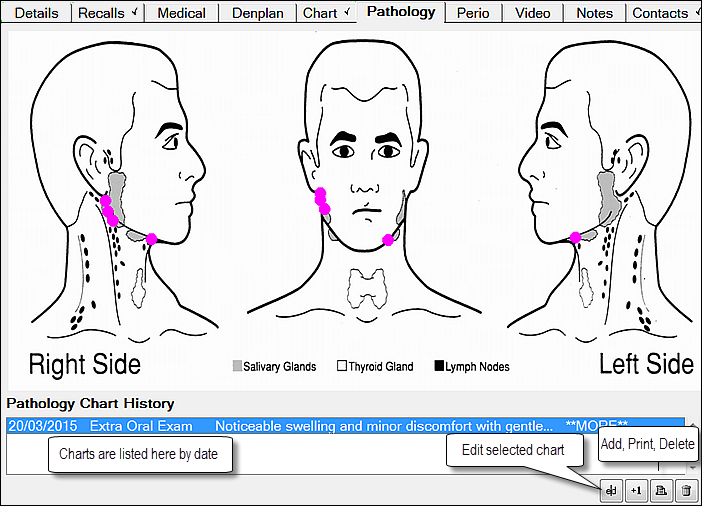
    7. If you make a mistake and need to remove a shape, either:

      - Click the Undo Last button, to remove the last shape added

      - Tick the Clear checkbox and then click and drag over the area to remove the shape.

      - Click Remove All to clear all shapes and markings from the chart.

  5. Type explanatory Pathology Notes.
  6. Make a Risk Assessment by checking one of the options:

    RiskAssessment

  7. Click OK to save the Chart.
  8. Back in the Pathology tab the chart is listed and can be edited:

    ExtraoralPathologyChart-Completed

See also...

Pathology Tab

Creating an IntraOral Pathology Chart

Altering Pathology Charts

Next >>

Altering Pathology Charts